Table of Contents
Thermostatic faucet cartridges represent a critical component in modern bathroom installations, providing precise temperature control and enhanced safety features. When these sophisticated mechanisms begin to malfunction, homeowners often face temperature inconsistencies, leaks, or complete system failures that can disrupt daily routines.
The replacement cost for thermostatic cartridges typically ranges from €50 to €150, depending on the manufacturer and model specifications. Premium brands such as Hansgrohe, Grohe, and Goodhome offer reliable options, though certain high-end models require proprietary cartridges that command significantly higher prices. Fortunately, homeowners equipped with basic tools including flathead and Phillips screwdrivers and hex keys can perform these replacements independently, potentially saving substantial labor costs.
This comprehensive guide examines the identification of thermostatic cartridge issues, provides detailed replacement procedures, and outlines preventive maintenance strategies that can extend component lifespan significantly, particularly in hard water environments.
What is a Thermostatic Faucet Cartridge and How Does it Work?
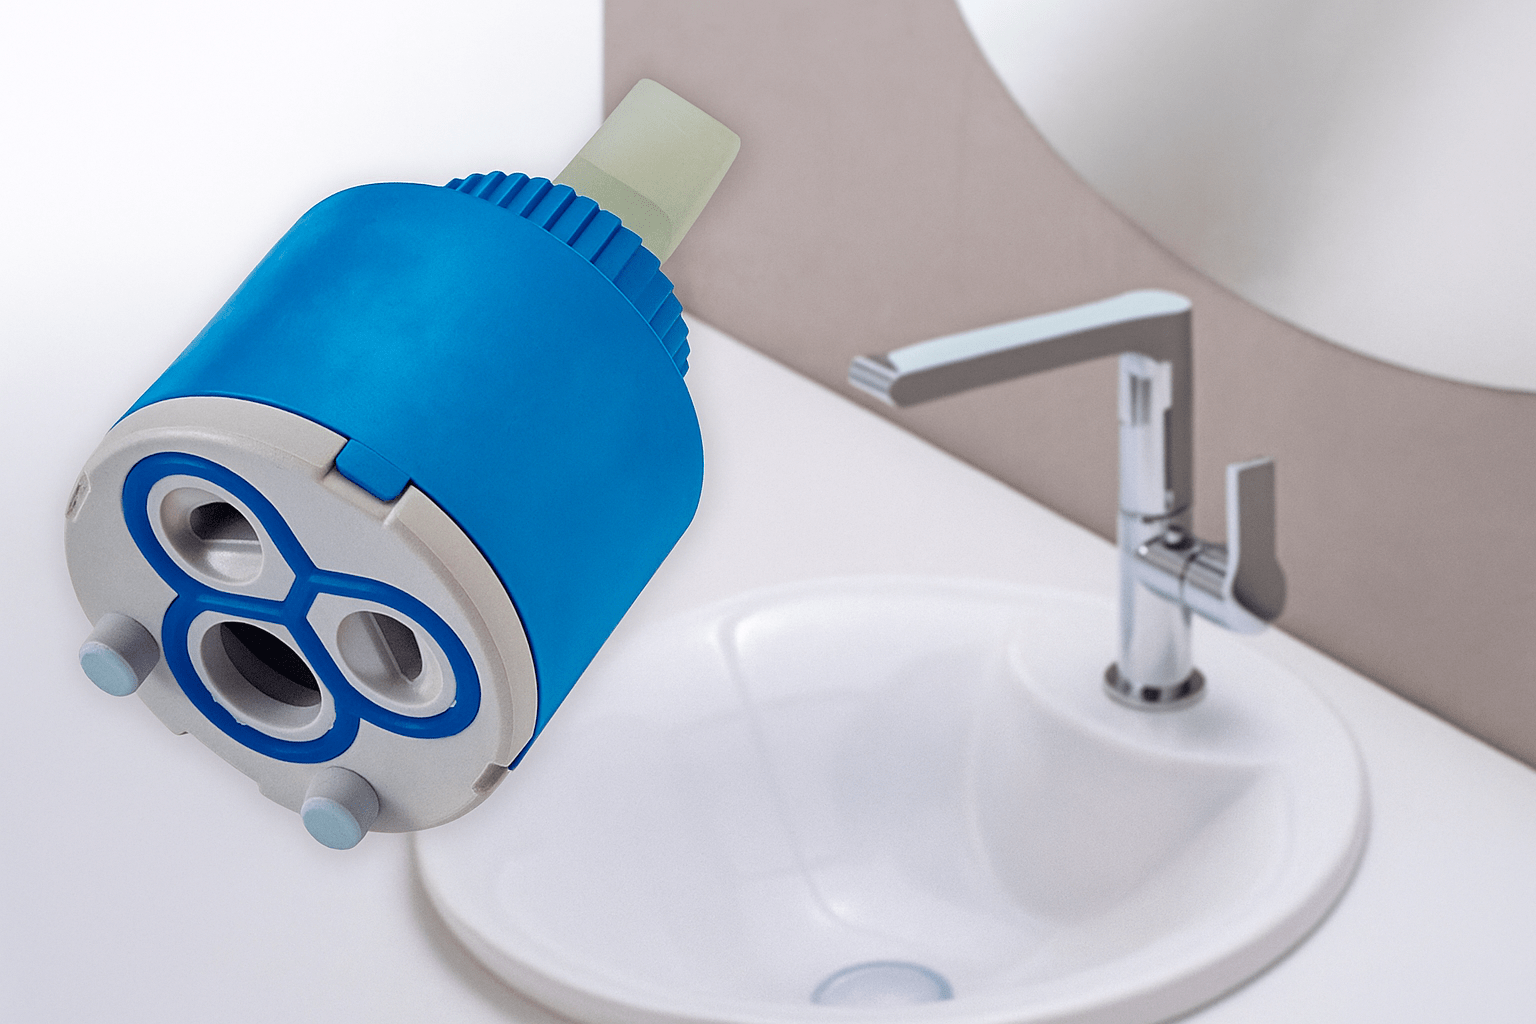
The thermostatic faucet cartridge serves as the intelligent control center of modern mixing systems, delivering consistent water temperatures regardless of pressure fluctuations throughout the plumbing network. This sophisticated component distinguishes itself from conventional mixing systems through its automated temperature regulation capabilities.
Role in Temperature Control
The thermostatic cartridge maintains precise water temperature control through its sensitive internal mechanism that responds instantaneously to thermal variations. This component automatically adjusts the proportions of hot and cold water to maintain the selected temperature setting, even when water demand changes elsewhere in the building.
The cartridge operates as a self-regulating system that continuously monitors water temperature and makes real-time adjustments to the mixing ratio. When users select a specific temperature setting, the thermostatic cartridge calculates the exact proportions of hot and cold water required to achieve that temperature and maintains these proportions consistently throughout the usage period.
Safety features include a preset temperature limiter, typically set at 38°C, which prevents accidental scalding incidents. In the event of cold water supply interruption, the system immediately shuts off hot water flow, providing an additional layer of protection against potential burns.
Difference from Ceramic Disc Head
The fundamental distinction between thermostatic cartridges and ceramic disc heads lies in their operational methodology and control mechanisms. Traditional mixing systems equipped with ceramic disc heads utilize a single control handle that manages both water flow and temperature through overlapping perforated ceramic discs that adjust their alignment to regulate water passage.
Thermostatic mixing systems feature dual controls with separate mechanisms for flow rate and temperature adjustment. This separation enables significantly more precise temperature control compared to single-handle ceramic disc systems. While ceramic disc heads require manual adjustment for each temperature change, thermostatic cartridges automatically compensate for pressure and temperature variations in the supply lines.
The response time differential between these systems is substantial. Thermostatic cartridges react immediately to supply variations, whereas ceramic disc heads require manual intervention to maintain desired temperatures when conditions change.
Position in a Thermostatic Mixer
The thermostatic cartridge integrates directly into the mixer body, typically positioned behind the temperature control mechanism. The flow control function remains separate, usually managed by a ceramic disc head positioned behind the secondary handle.
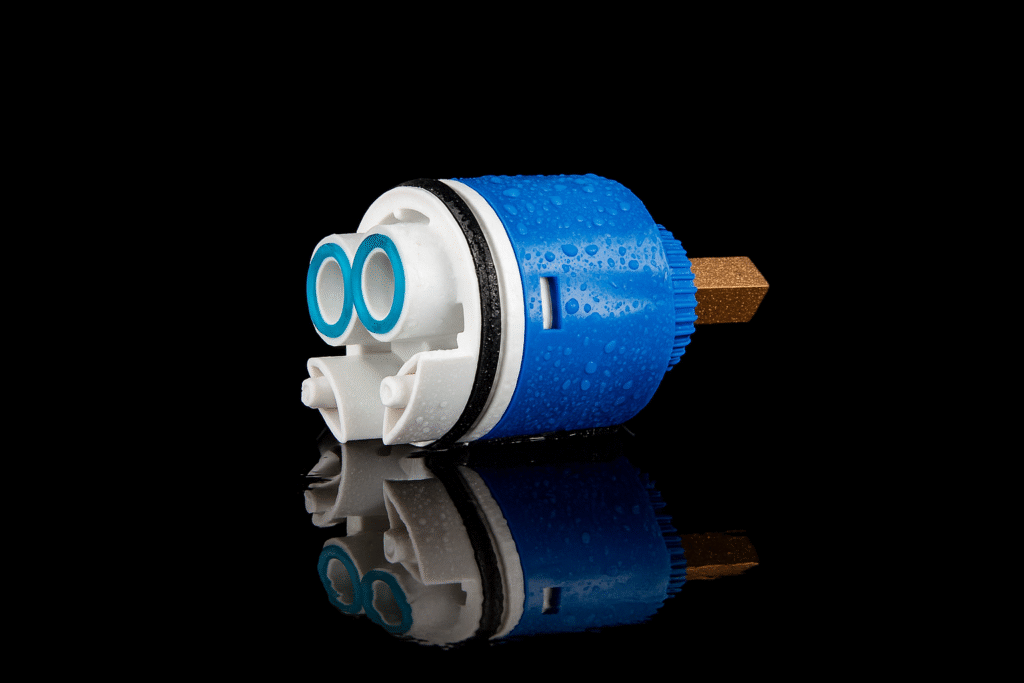
The cartridge assembly comprises several critical components including a variable-diameter head that corresponds to specific mixer models, three O-rings that ensure proper sealing, and a housing with dedicated ports for hot water inlet, cold water inlet, and mixed water outlet. Additional components include an axial rod, control unit, and safety check valve that work together to maintain system integrity.
Proper installation requires connection to both hot and cold water supply lines for optimal functionality. Each manufacturer typically requires specifically designed cartridges for their mixer models, though some companies offer universal versions that accommodate multiple systems. Regular maintenance protocols recommend weekly temperature control adjustments to cold settings to prevent internal component seizure and extend operational lifespan.
Common Signs of a Faulty Thermostatic Cartridge
Recognition of thermostatic cartridge failure symptoms enables proactive intervention before complete system breakdown occurs. These indicators typically develop gradually and signal the need for maintenance or replacement procedures.
Unstable or Stuck Temperature
Temperature instability represents the most prevalent symptom of cartridge deterioration. Users may experience sudden temperature fluctuations without adjusting the control settings, or encounter situations where water remains lukewarm despite maximum heat settings. Conversely, some systems may deliver unexpectedly hot water without warning, creating potential safety hazards.
These temperature inconsistencies indicate internal mechanism degradation that compromises the cartridge’s ability to maintain proper mixing ratios. The sensitive components responsible for temperature regulation may become damaged or obstructed, preventing accurate thermal control.
Hard-to-Turn or Stuck Handle
Control handle resistance during operation typically indicates internal mechanical problems within the cartridge assembly. Users may experience difficulty rotating temperature or flow controls, requiring excessive force to achieve position changes.
Limescale accumulation represents the primary cause of handle resistance, as mineral deposits build up between moving components and create friction that impedes smooth operation. Hard water conditions accelerate this accumulation process, leading to progressively worsening control difficulties.
Corrosion of internal metallic components can also contribute to handle resistance problems. This deterioration process intensifies in environments with high mineral content or aggressive water chemistry conditions. Attempting to force stuck controls may result in permanent internal damage that necessitates complete cartridge replacement rather than repair.
Water Leakage at the Handle
Handle leakage manifests as water dripping around temperature or flow controls even when the system is in the closed position. This symptom indicates seal failure within the cartridge assembly and requires immediate attention to prevent progressive deterioration.
O-ring degradation typically causes these leaks as the elastomer seals lose their flexibility and sealing capability over time. Normal wear patterns include hardening, cracking, and deformation that allow water to bypass the sealing surfaces and escape at the weakest points around the control handles.
Initial leakage may appear minimal with occasional droplets, but these conditions typically worsen rapidly without intervention. Before disassembling the cartridge, users should attempt to resolve minor leaks by tightening the handle assembly. Persistent leakage indicates internal seal damage that requires O-ring replacement or complete cartridge renewal.
When to Replace vs. Clean a Thermostatic Cartridge
Determining whether to clean or replace a thermostatic cartridge requires careful evaluation of component condition and failure severity. These components typically provide five to ten years of service life under normal operating conditions, though water quality and usage patterns significantly influence longevity expectations.
O-Ring Wear
O-ring deterioration represents one of the most common failure modes in thermostatic cartridges. These elastomer seals provide critical sealing between internal components and deteriorate through normal wear cycles, exposure to temperature variations, and chemical interactions with water treatment additives.
Seal degradation typically manifests as hardening, cracking, or dimensional changes that compromise sealing effectiveness. When water escapes around mixer handles despite proper closure, O-ring failure is the most likely cause. Fortunately, O-ring replacement represents an economical repair option that costs minimal amounts compared to complete cartridge renewal.
During cartridge disassembly procedures, users should carefully inspect all O-ring seals and apply food-grade silicone lubricant before reassembly to enhance sealing performance and extend service life.
Limescale Buildup
Mineral deposits pose the greatest threat to thermostatic cartridge longevity, as limescale accumulation gradually impairs component movement and thermal sensing capabilities. These deposits manifest through temperature adjustment difficulties, uncontrolled temperature variations during operation, control resistance, and complete mechanism blockage in severe cases.
Water hardness levels significantly influence scaling rates, with hard water conditions accelerating mineral accumulation and substantially reducing cartridge service life. Intensive system usage compounds this effect by increasing the volume of mineral-laden water passing through the mechanism.
Regular descaling procedures can often restore proper cartridge function without requiring complete replacement, making cleaning attempts the logical first intervention for scaling-related problems.
When Cleaning is Enough
Many cartridge problems respond effectively to thorough cleaning procedures without requiring component replacement. Descaling represents the primary intervention for mineral-related malfunctions and should be attempted before considering replacement options.
Effective cleaning requires complete cartridge immersion in white vinegar for a minimum of eight hours. This acidic solution naturally dissolves limescale deposits that impede mechanical operation. Following the soaking period, thorough rinsing with clean water removes dissolved minerals and acid residue before reinstallation.
Manufacturers typically recommend annual preventive maintenance schedules, with increased frequency in hard water areas where mineral accumulation occurs more rapidly. When cleaning procedures fail to restore proper operation, replacement becomes necessary to maintain system functionality and safety.
Step-by-Step Guide to Replace a Thermostatic Faucet Cartridge

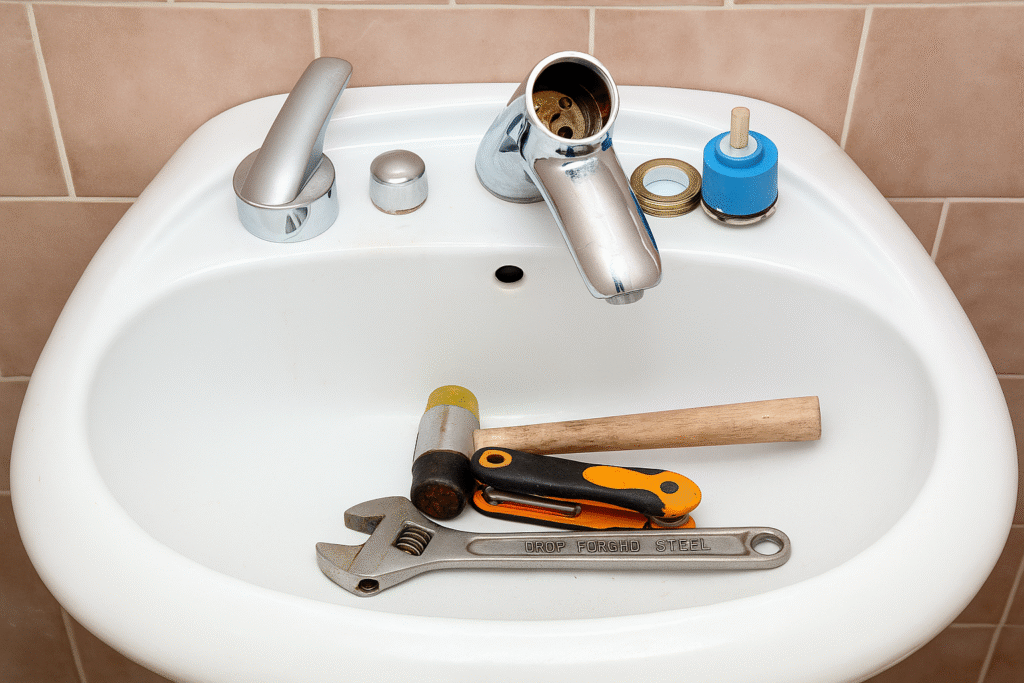
Thermostatic cartridge replacement requires systematic procedures to ensure successful completion and proper system restoration. Following established protocols minimizes the risk of component damage and ensures reliable long-term operation.
Shut Off Water and Drain Mixer
Water supply isolation represents the critical first step in cartridge replacement procedures. Locate the main shutoff valve and rotate it one-quarter turn clockwise to stop water flow. Systems with individual supply valves require closure of both hot and cold water lines to ensure complete isolation.
After shutoff completion, open the mixer controls to drain residual water from the system and relieve internal pressure. This precautionary measure prevents flooding during disassembly procedures and creates safer working conditions for component removal.
Disassemble the Thermostatic Handle
Handle removal begins with locating the screw cover on the temperature control, typically positioned at the handle end. Carefully remove this cover using a flathead screwdriver to access the internal fastening screw. Document or photograph the safety button position before proceeding, as this component must be reassembled in its exact original location.
Remove the handle by unscrewing the retention screw using either a Phillips screwdriver or 3mm hex key, depending on the manufacturer’s specifications. Handle removal provides access to the cartridge assembly for subsequent extraction procedures.
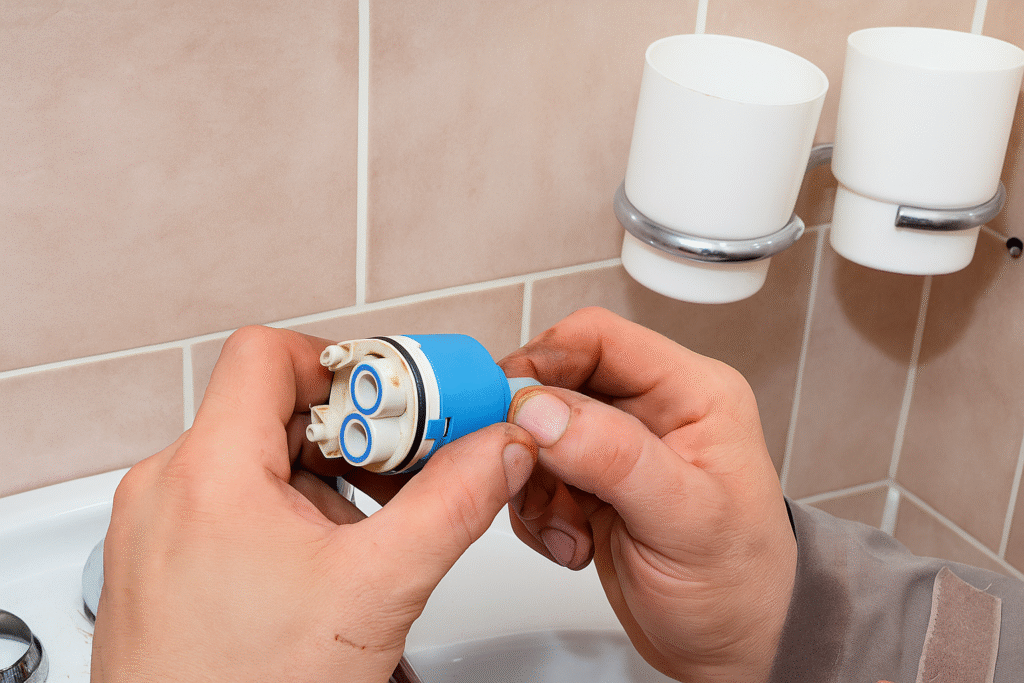
Remove and Inspect Cartridge
Cartridge extraction requires removal of the locking screw using the appropriate hex key or screwdriver. This fastener may be concealed under a protective cover or located beneath the faucet assembly. Once the locking mechanism is released, extract the thermostatic cartridge by pulling firmly on the component.
Cartridges that resist removal may have limescale buildup that creates adhesion to the housing. Apply gentle pressure using adjustable pliers while taking care to avoid damaging the cartridge body or surrounding components.
Clean or Replace
Thorough cartridge inspection determines whether cleaning or replacement provides the appropriate solution. Cleaning procedures involve extended soaking in hot white vinegar to dissolve mineral accumulations, followed by comprehensive rinsing to remove cleaning residue.
O-ring inspection should accompany cleaning procedures, with replacement of any seals showing wear, cracking, or deformation. Apply silicone lubricant to all sealing surfaces before reassembly to improve installation ease and enhance sealing performance.
Reassemble and Test
Cartridge installation requires proper alignment of mounting holes with the mixer body before securing with the locking screw. Handle reinstallation must maintain the original safety button position to preserve the preset temperature limitation function, typically set at 38°C for burn prevention.
Complete the assembly by installing the handle fastening screw and replacing the decorative cover. Restore water supply and conduct comprehensive functional testing to verify proper temperature control and leak-free operation throughout the full range of settings.
Maintenance Tips to Extend Cartridge Lifespan
Proactive maintenance significantly extends thermostatic cartridge service life while reducing the likelihood of unexpected failures. These preventive measures require minimal investment while providing substantial cost savings through extended component longevity.
Run Cold Water Regularly
Establishing a routine of setting controls to the cold position after each use prevents limescale accumulation on internal components and maintains mechanism mobility. This simple practice should follow every shower session to provide maximum protective benefit.
Regular exercise of temperature controls through their complete range maintains internal component mobility and prevents mineral deposits from creating permanent restrictions. In hard water areas, concluding each shower with thirty seconds of cold water flow effectively rinses internal mechanisms and removes mineral residue.
Annual Descaling with White Vinegar
White vinegar provides an effective, economical solution for removing inevitable limescale accumulation from cartridge internals. Annual descaling procedures are recommended for normal water conditions, with increased frequency to six-month intervals in very hard water areas.
Descaling procedures require complete cartridge disassembly followed by full immersion in pure white vinegar for eight to twelve hours. This extended contact time ensures complete dissolution of mineral deposits throughout the internal mechanisms. Thorough rinsing with clean water removes dissolved minerals and acid residue before component reassembly.
Component mobility should be verified before reinstallation to confirm successful cleaning results and proper mechanical operation.
Preventive O-Ring Replacement
O-ring seals represent the most vulnerable components in thermostatic cartridge assemblies and benefit from preventive replacement every two to three years. These inexpensive components cost minimal amounts but their failure can necessitate complete cartridge replacement if damage extends to other internal components.
During routine descaling procedures, inspect all O-ring seals for signs of wear including cracking, hardening, or dimensional changes. Replace questionable seals immediately rather than risking future leakage problems. Apply food-grade silicone lubricant to new seals before installation to enhance sealing performance and extend service life.
Conclusion & Key Takeaways
Thermostatic faucet cartridges provide essential temperature control and safety functions in modern bathroom installations. Understanding their operation, recognizing failure symptoms, and implementing appropriate maintenance procedures enables homeowners to maximize component longevity while minimizing repair costs.
Most thermostatic cartridge problems respond to cleaning and minor component replacement rather than complete renewal. White vinegar descaling often restores proper function to mineral-affected cartridges, while O-ring replacement provides an economical solution for sealing problems. These interventions cost significantly less than professional service calls or complete cartridge replacement.
When replacement becomes necessary after five to ten years of service, homeowners can perform these procedures independently with basic tools and careful attention to proper procedures. This capability provides substantial savings while ensuring continued system reliability and safety.
Preventive maintenance represents the most effective strategy for extending cartridge service life. Simple practices including post-use cold water rinsing, annual descaling, and preventive seal replacement can substantially delay replacement requirements while maintaining optimal performance standards.
FAQs
What are the signs that a thermostatic cartridge needs replacing?
Primary indicators include unstable water temperature, difficulty adjusting temperature settings, excessive resistance when operating controls, and water leakage around handle areas. When these symptoms persist after thorough cleaning procedures, replacement typically becomes necessary.
What is the average lifespan of a thermostatic cartridge?
Thermostatic cartridges typically provide five to ten years of reliable service under normal operating conditions. Service life varies significantly based on water quality characteristics and frequency of system usage.
How can I maintain my thermostatic cartridge to extend its lifespan?
Effective maintenance includes running cold water after each use, performing annual descaling with white vinegar, and replacing O-ring seals every two to three years. These preventive measures significantly delay replacement requirements while maintaining optimal performance.
Can a thermostatic cartridge be repaired without full replacement?
Many cartridge problems respond to cleaning and minor component replacement procedures. Descaling often resolves mineral-related malfunctions, while O-ring replacement provides economical solutions for leakage problems. Complete replacement becomes necessary only when these interventions fail to restore proper operation.
How can I replace my thermostatic mixer cartridge myself?
Replacement procedures begin with water supply shutoff and system drainage, followed by handle disassembly and cartridge extraction. After cleaning the housing and installing the new cartridge, reassemble the handle while maintaining proper safety button positioning. Restore water supply and conduct comprehensive testing to verify proper operation.
Leave a Reply