Table of Contents
Transform your bathroom into a modern sanctuary with these stunning walk-in shower designs. From corner installations to sloped ceiling solutions, discover layout ideas and expert recommendations that will elevate your space.
Walk-in showers have revolutionized modern bathroom design, offering an elegant blend of style and functionality that’s hard to resist. These sleek, contemporary fixtures create an immediate sense of spaciousness while providing the ultimate in bathing convenience. Whether you’re planning a complete bathroom renovation or building from scratch, walk-in shower ideas can transform even the most challenging spaces into luxurious retreats.
The beauty of modern shower designs lies in their versatility. From compact corner solutions to expansive glass-enclosed sanctuaries, there’s a walk-in shower configuration that can work in virtually any bathroom layout. The key is understanding your space’s technical constraints while ensuring proper waterproofing throughout your bathroom renovation project.
Ready to explore the possibilities? Here are 12 innovative walk-in shower ideas that showcase different approaches to this popular bathroom trend.
1. Luxurious Glass Cube Design
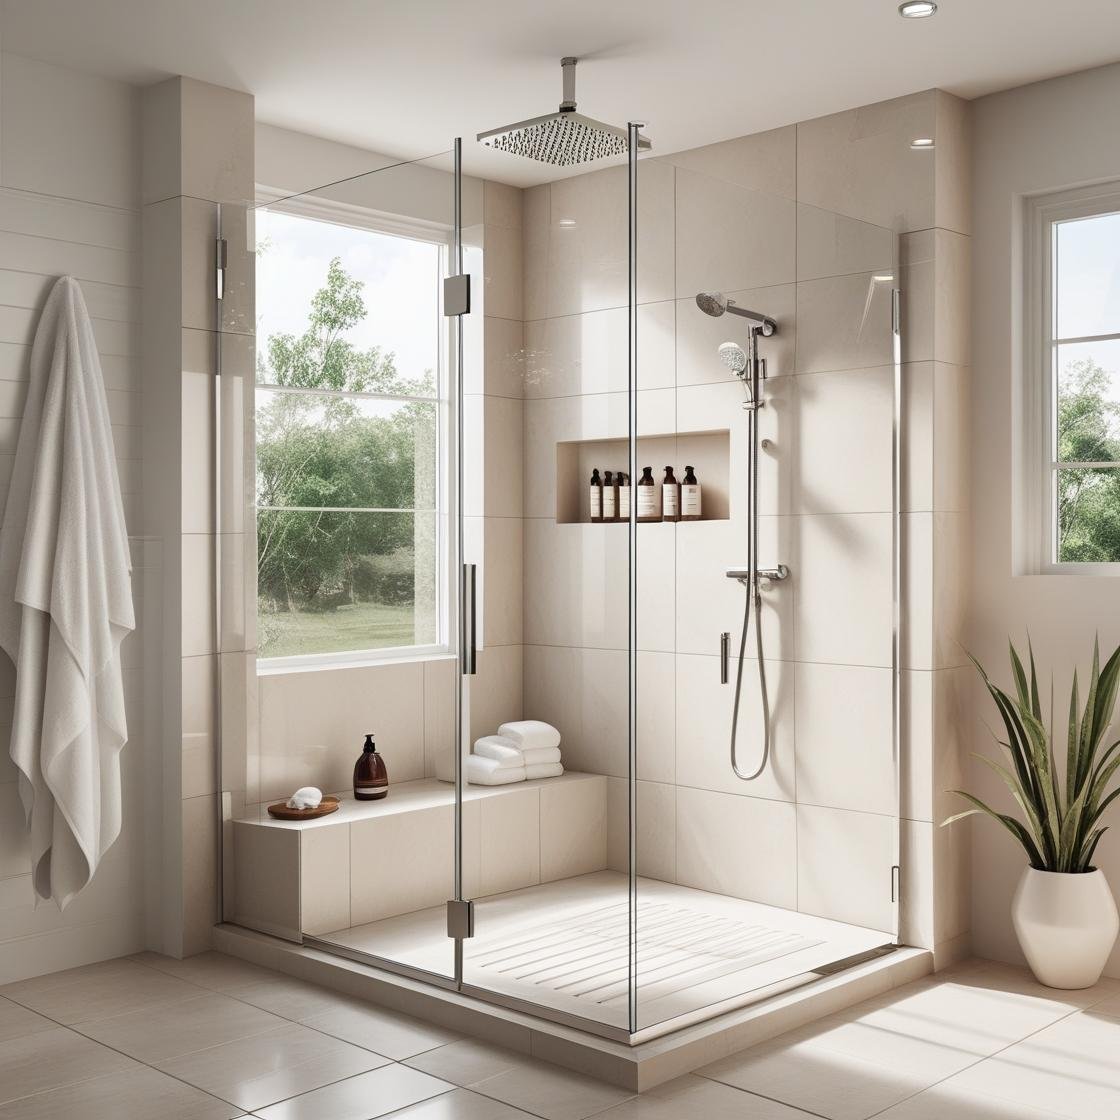
Create a spa-like experience with a shower fully enclosed by pristine glass panels. This design prevents water from splashing outside while maintaining an open, airy atmosphere throughout your bathroom. Although this approach doesn’t strictly follow the traditional open walk-in concept, it incorporates all the essential features: effortless accessibility, a spacious flat shower tray, and seamlessly integrated fixtures.
This glass cube approach works exceptionally well in bathrooms with generous square footage, where you can fully appreciate the dramatic visual impact. The transparent walls allow natural light to flow freely, making your entire bathroom feel larger and brighter.
Pro Tip: If your shower includes a hydro-massage showerhead, you’ll need a sliding door or panel to contain the increased water pressure. Choose glass that’s specially treated against smudges and limescale buildup to maintain that crystal-clear appearance with minimal maintenance.
2. Sleek Corridor-Style Installation

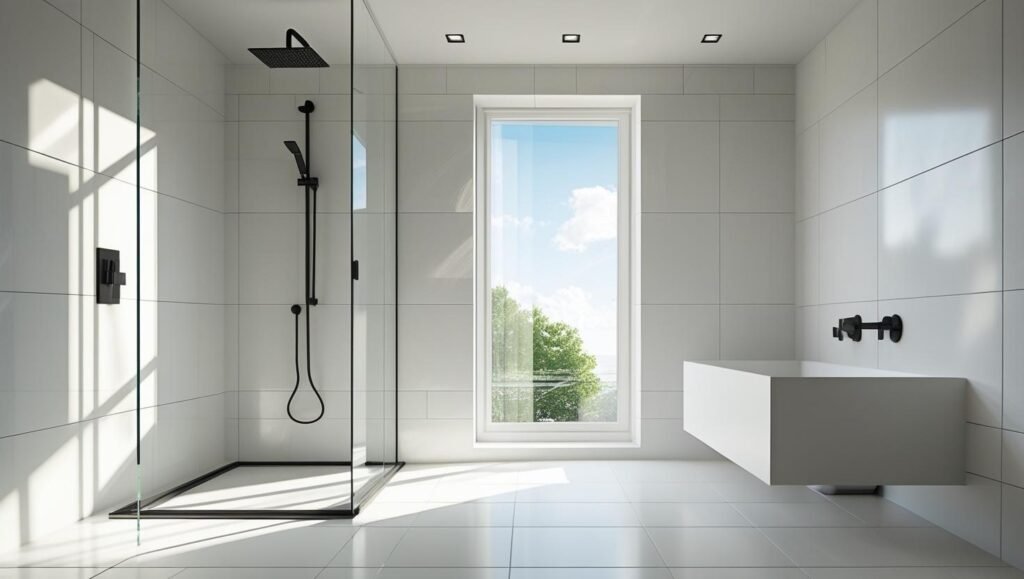
Position your walk-in shower along one side of the room with a single elegant glass panel for a clean, contemporary look. This Australian-inspired design demonstrates how minimal elements can create maximum impact in your bathroom renovation.
For optimal water containment, install a glass panel that measures 2 meters high and 120 to 150 centimeters wide. Choose 8-millimeter thick glass for both safety and durability, paired with a wall profile for that polished, professional finish.
This modern shower design eliminates the traditional shower tray, instead featuring installation directly onto a waterproof screed with an embedded floor drain. The result is a seamless transition where your bathroom floor extends directly into the shower area, creating an uninterrupted, open aesthetic that’s both striking and practical.
3. Space-Saving Corner Solution

Maximize every square inch of your bathroom with a corner walk-in shower installation. This layout proves particularly valuable in small bathrooms or rooms with challenging architectural features, transforming often-wasted corner space into a functional showering area.
Corner installations offer excellent space efficiency while maintaining the modern appeal of walk-in shower ideas. Remember to maintain a minimum opening width of at least 80 centimeters to ensure comfortable access and use.
When preparing the foundation, create a slope of 1 to 3% for proper drainage—this varies depending on your chosen flooring material. For example, pebble surfaces require a slightly steeper slope of 2.5 to 3% to ensure effective water flow.
4. Dual-Function Design with Bathtub

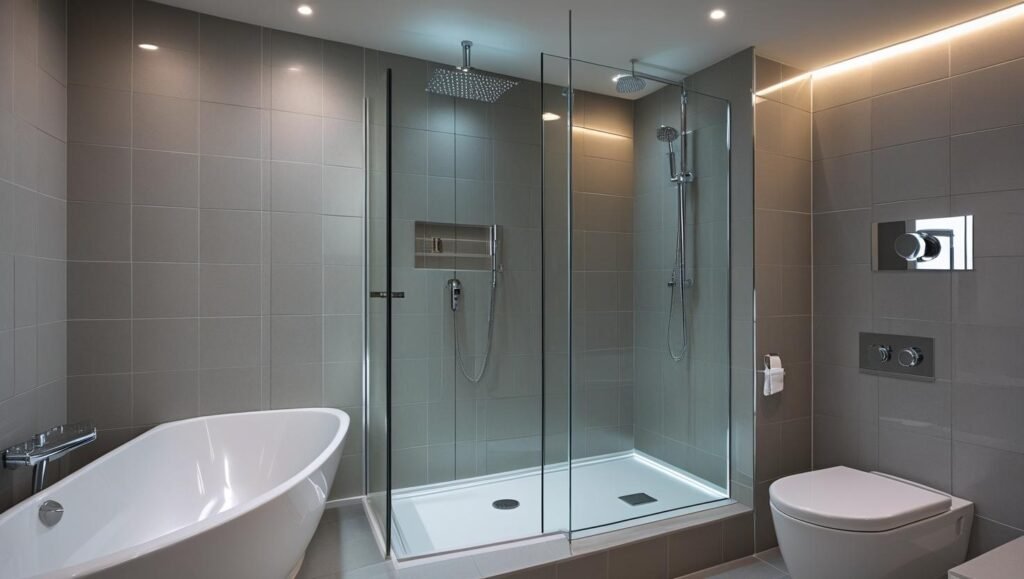
Why choose between a bathtub and shower when you can enjoy both? This thoughtful design combines a freestanding bathtub with a walk-in shower, separated by a simple transparent glass panel that preserves natural light flow throughout the space.
The glass partition maintains visual continuity while providing necessary water protection. A built-in storage niche keeps your bathing products easily accessible from both the shower and tub areas.
Technical Note: Effective drainage requires careful planning. Select a drain that matches your shower’s surface area and expected water flow, with a trap of at least 90 millimeters and a pipe diameter of no less than 50 millimeters for optimal performance.
5. Smart 2-in-1 Configuration
Transform limited space into a versatile bathing area with this ingenious design that combines shower and bathtub functionality in one compact footprint. This approach works particularly well in smaller bathrooms where separate installations aren’t feasible.
Understanding proper fixture heights ensures both comfort and functionality. Install your shower mixer at 110 centimeters above the lowest point of the shower water outlet for standard use. Hand shower fixtures require positioning at 200 centimeters above the outlet, while rain-type showerheads need mixers positioned between 200 and 220 centimeters high. For showerpipe installations, position the mixer at approximately 120 centimeters.
6. Bedroom-Bathroom Integration with Platform Design

Open up your living space by combining bathroom and bedroom areas with a walk-in shower positioned behind a headboard. This innovative approach works exceptionally well in loft-style spaces or master suite renovations.
A raised platform of around 15 centimeters serves dual purposes: it helps define the shower area while providing practical space to conceal drain and waste pipes within the elevated structure. This solution proves particularly valuable when floor space is at a premium.
7. Privacy with Half-Wall Partition

Create subtle separation without sacrificing openness using a half-wall partition. This design strategy effectively defines different bathroom zones—shower area, vanity space, and toilet area—while maintaining an airy, light-filled atmosphere.
Half-walls provide the perfect balance between privacy and openness, preventing your bathroom renovation from feeling cramped or compartmentalized.
Design Reminder: Plan for a minimum shower area of 80 x 120 centimeters to ensure user comfort and minimize water splash concerns.
8. Alcove Transformation

During major bathroom renovations, existing alcoves or former closet spaces present excellent opportunities for walk-in shower installation. These naturally defined spaces often provide ideal proportions for shower areas while maximizing your bathroom’s overall functionality.
Respect minimum space requirements while taking advantage of existing architectural features. For enhanced privacy, consider opaque or frosted glass options that still allow light transmission while providing visual screening.
9. Central Placement with Shared Wall

Strategic placement of your walk-in shower against a central wall (whether existing or newly constructed) can create efficient use of plumbing while maintaining clean sight lines throughout your bathroom. This minimalist approach emphasizes thoughtful material selection and well-planned storage solutions.
Installation Note: Allow 10 to 20 centimeters of space beneath the shower tray to accommodate the drainage system, depending on your specific installation requirements.
10. Long Bathroom End-Zone Design

The far end of an elongated bathroom provides an ideal location for a walk-in shower installed on waterproof screed. This placement takes advantage of often-underutilized space while creating a dramatic focal point.
A strategically placed glass panel helps maintain natural light distribution throughout the length of your bathroom, preventing the shower area from feeling isolated or dark.
11. Sloped Ceiling Character

Transform architectural challenges into design opportunities by installing your walk-in shower beneath a sloped ceiling. This configuration adds natural charm and visual warmth to your bathing space.
Maintain visual continuity by extending your tile pattern seamlessly across different surfaces, creating the illusion of expanded space even within the angled confines.
Safety Reminder: When your shower isn’t enclosed by walls or doors, waterproof the entire bathroom area that might be exposed to water splashes. Remember that electrical safety is paramount—no standard electrical appliances should be installed in walk-in showers or showers without trays.
Approved electrical installations include:
- SELV 12V powered lighting fixtures and switches
- Electric water heaters (minimum IPx5 rating)
- Class 2 heaters and lighting fixtures
- Shaver sockets rated 20 to 50 VA (minimum IPx4 rating)
12. Room-Within-a-Room Cube Design

Create dramatic impact by constructing a shower “cube” in the center of your bathroom space. This bold design approach offers three significant advantages: it introduces striking originality to your bathroom renovation, enhances user comfort through complete enclosure, and provides privacy screening for other bathroom fixtures positioned behind the partition.
This black designer walk-in shower demonstrates how modern shower designs can serve as functional art pieces that completely transform your bathroom’s character and flow.
Your Walk-In Shower Journey
Walk-in shower ideas offer endless possibilities for creating the bathroom of your dreams. Whether you’re working with a compact space that needs a clever corner solution or a generous area perfect for a luxurious glass cube design, there’s a configuration that will meet your needs and exceed your expectations.
The key to successful bathroom renovation lies in understanding your space’s unique characteristics while maintaining focus on both style and functionality. Each of these 12 approaches offers proven solutions that real homeowners have successfully implemented in their own spaces.
Have you discovered a walk-in shower design that speaks to your vision? We’d love to see your bathroom renovation projects and hear about the solutions that worked best in your space. Share your photos and experiences in the comments below—your insights might inspire another homeowner’s perfect bathroom transformation!
Leave a Reply